Since its release, the $35 Raspberry Pi mini-computer has been hailed as the perfect all-in-one retro game console. Now, it’s easier to do than ever, and it doesn’t take any Linux knowledge whatsoever. Here’s how to make your own retro game console in under 10 minutes.
We’ve walked you through all sorts of DIY projects for the Raspberry Pi, but this one might be the simplest. You’ll have your retro game console—complete with old-school controllers—up and running in less than 10 minutes. All you need to do is install the operating system on an SD card and do some simple file sharing from your PC.
Before we get started, let’s go over some basics. Emulating old-school video games requires two things: game ROMs and an emulator to play them. A ROM is a copy of a game that exists on your device. An emulator is an application that can play that ROM. The rule of emulator ethics is that you should have a physical copy of a game if you have a ROM (or youcan create your own from your old cartridges). We’ll leave it to you to come up with the ROMs on your own. With that, let’s get the Raspberry Pi set up.
What You’ll Get
Your Raspberry Pi will boot automatically into EmulationStation. This is a program running off a custom SD card called RetroPie that allows you to use a controller to select an emulator and a game without ever touching a keyboard or mouse. After everything’s set up, you’ll be able to navigate and do everything you need to do on the Raspberry Pi from a controller.
Alongside the games, you’ll also get access to a full version of the media center software, Kodi (you’ll need to pop into some advanced settings to download Kodi). This means you can basically have an all-in-one entertainment center that runs classic games and your media center. It’s a pretty killer setup.
What systems can you emulate? A lot of them:
- 3do
- Adventure Game Studio
- Amiga
- Amstrad CPC
- Apple II
- Atari ST/STE/TT/Falcon
- Atari 2600
- Atari 5200 and 8 bit series
- Atari 7800
- Atari Jaguar
- Atari Lynx
- CoCo
- Colecovision
- Commodore 64
- Daphne
- Dragon 32
- Dreamcast
- FinalBurn Alpha
- Game & Watch
- Game Gear
- Game Boy
- Game Boy Color
- Game Boy Advance
- Intellivision
- Macintosh
- MAME
- Master System
- Megadrive/Genesis
- MESS
- MSX
- Nintendo 64
- Nintendo DS
- Nintendo Entertainment System
- Neo Geo
- Neo Geo Pocket
- Neo Geo Pocket Color
- PC
- PC Engine/TurboGrafx-16
- PSP
- PlayStation 1
- SAM Coupé
- Saturn
- ScummVM
- Sega 32X
- Sega CD
- Sega SG-1000
- Super Nintendo Entertainment System
- Vectrex
- Videopac/Odyssey2
- Virtual Boy
- WonderSwan
- WonderSwan Color
- Zmachine
- ZX Spectrum
- You’ll also get a number of special ports for specific games, includingQuake, Minecraft Pi, Baldur’s Gate, and mo
What You Need
You don’t need much to get started here:
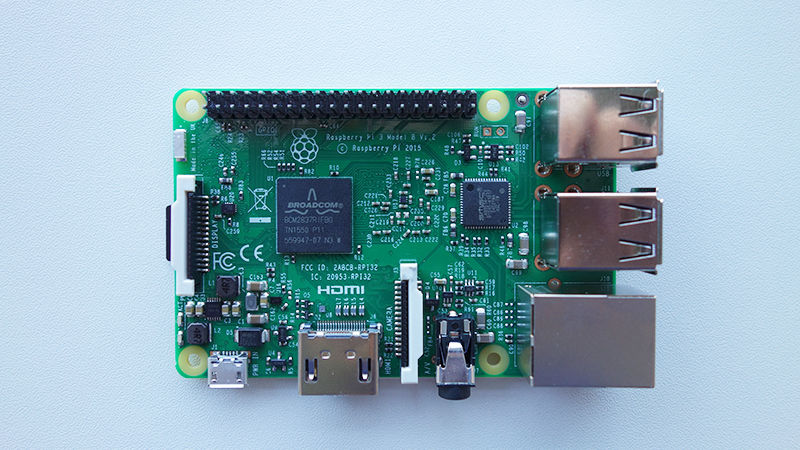
A Raspberry Pi (We recommend the Raspberry Pi 3 because you’ll get full game compatibly as well as built-in Wi-Fi and Bluetooth. RetroPie will work on older versions of the Raspberry Pi though) and power supply. At least a 4 GB Micro SD card. USB Controllers (optional, but makes the whole thing a lot more fun. I used these cheap USB SNES controllers from Amazon). RetroPie alsonatively supports PS3 and Xbox 360 controllers as well. A USB keyboard (just for the initial setup and only if you want to set up Wi-Fi, you won’t need it afterwards. Of course, if you’re emulating PC games you can use a keyboard and mouse to control them). TV/monitor, AV/HDMI cables, power supply (you can find a full list of compatible SD cards, power bricks, and everything else on the Raspberry Pi Wiki). A Windows/Mac/Linux computer to transfer your ROMs.
Step One: Download and Install RetroPie on a SD Card
Because of the work of RetroPie, the process of installing all of these emulators on your Raspberry Pi is incredibly easy:
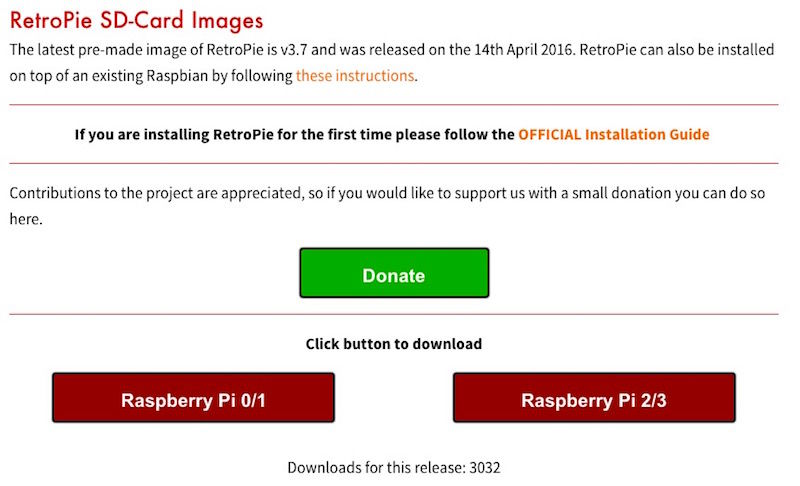
Download the RetroPie Project SD card image for your version of the Raspberry Pi (either 0/B/B+ or 2/3). For this guide, we’re using version 3.7. One warning though, this sucker can take a while to download depending on how busy their servers are, so give yourself plenty of time. Once it’s downloaded, extract the image to the SD card the same way you would a normal Raspbian image. Windows users can do this really easily with the Win32DiskImager, and Mac users can use the RPI-sd card builder. Linux users have to a pretty simple command line trick. Either way, check out our beginner’s guide to DIYing with the Raspberry Pi and follow the same instructions you would with Raspbian. When it’s done, remove the SD card and put it in your Raspberry Pi. As far as the initial setup, that’s all you need to do. In fact, if you plan on using a keyboard and mouse instead of a controller you’re basically done and can skip to step five to transfer over your ROM files.
If you’d prefer to manually install the emulators, you can do that as well.The RetroPie Github page has a guide for doing it, but be warned: the manual process takes around six to nine hours to download and install everything. The benefit is that you get the newest versions of emulators and you can select what gets installed. For our purposes though, the above method works great and is incredibly simple.
Step Two: Boot Your Raspberry Pi and Set Up EmulationStation
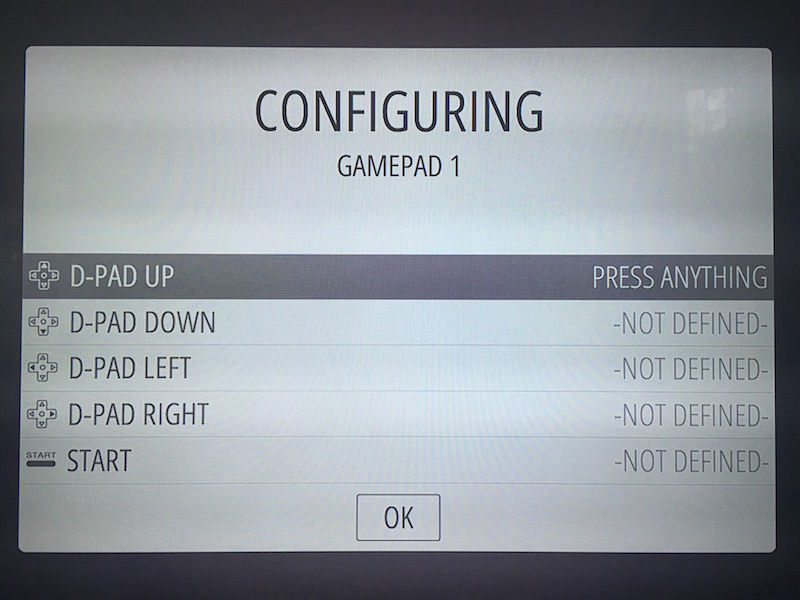
Next up we’ll boot up your Raspberry Pi. Plug in one of your controllers and your keyboard to the Raspberry Pi. Insert the SD card you just burned, and turn the Raspberry Pi on. After a couple of minutes of automatic set up (it will expand the file system and prepare some other stuff), it will boot directly into EmulationStation, the interface wrapper with all your emulators on it. Here, you’ll set up your controller and do a few other tweaks to get the system set up.
On its first boot, follow the onscreen prompts with your controller to set it up (up, down, left, right, etc). When you’re finished, you can navigate through your RetroPie with just your controller. These controls will work in both the emulators and in RetroPie itself. On top of controlling basic movement, you also get a number of “hot keys” so you can quickly do certain actions from inside games:
Select+Start: Exit a game Select+Right Shoulder: Save Select+Left Shoulder: Load Select+Right: Input State Slot Increase Select+Left: Input State Slot Decrease Select+X: RGUI Menu Select+B: Reset Not all of these shortcuts are useful for everyone, but you should at least know how to exit a game, create a save, and load a save.
One other thing that’s worth noting, while RetroPie comes packed with a ton of emulators, it hides all the emulators that don’t have games installed. So when you’re first browsing RetroPie, you’ll notice that only a small handful of emulators are available. Don’t worry! This is how it’s supposed to work. The other emulators will show up as you add games.
Step Three: Set Up Wi-Fi
The newest version of RetroPie has a built-in system where you can access all your Raspberry Pi settings, tweak your memory, and more right from EmulationStation. Most of these settings are for advanced users, but one pretty much everyone will want to set up is Wi-Fi:
Scroll down to the Configure WiFi option and tap the A button. Select “Connect to WiFi Network” and choose your network. Type in your password and select okay. That’s it for the base setup. If you want to tinker around some more, this is where you’ll do it. You can edit the theme of RetroPie, set up Bluetooth, manage files, and much more in this area. Most of this stuff isn’t worth toying around until you’re a little more comfortable with the basics though. Check out our guide to RetroArch (the backbone of the RetroPie system) if you’re interested in how to tweak some of these advanced options.
Step Four (Optional): Transfer Your ROMs from Your Primary Computer
For this step, we’re going to assume you already have a bunch of ROMs on your primary computer that you want to transfer to your Raspberry Pi. This is super easy to do:
Make sure your Raspberry Pi is on, and connected to your router. From Windows open up the file manager and type \\retropie into the folder location. On Mac, open up finder and Select Go > Connect to Server. Type in smb://retropie and click connect. From here on out, you’ll be able to easily copy ROMs to the Raspberry Pi remotely through this method, so don’t worry if you want to add more down the line. Once the file transfer is done, go ahead and reboot the Raspberry Pi with your controllers connected and everything should be good to go.
If you’d prefer to use a USB drive full of ROMs, you can do that too. Just dump them onto the USB drive in a folder with the name retropie and then plug it into your Pi.
Further Resources
Once you finish the above, your Raspberry Pi should boot directly into the EmulationStation every time you start it, and you’ll able to control the whole thing with your attached controllers—no keyboard or mouse required. That said, if you’re having problems, resources are available to you. Here are a few places to seek out help:
RetroPie: The official page for the RetroPie Project. Includes lots of guides, tips, and a forum for troubleshooting. RetroArch: RetroArch is the backbone of the RetroPie, so if you want to tinker with options, this is where you’ll do it. The Raspberry Pi forums: Lots of people are sharing their tips for getting emulators working better, as well as different controller setups, and more in the official Raspberry Pi forums. RetroZone: RetroZone is a collection of a various old-school controllers that can help you find the USB controller for the console you want.