Home
Best way to install https cert for free.
- Details
I run my fair share of websites. I have found the best way to install https certs for free is the certbot tool (I use Ubuntu and Apache).
The simplest way to get started is to get your site viewable with no SSL. Make sure you can go to via https (you'll get a cert warning). Follow the link to the above instructions for your OS and Web Server.
Pro tip: make 3 config for your one site (see below sample for Apache2).
- Port 443 using www; www.yourdomain.com
- Port 443 no www; yourdomain.com
- Port 80 which redirect to one of the above.
Either send the www to the non-www or vice versa and point your non https(port 80) to that one as well
Have certbot make a cert for www and the non-www sites.
Note: Also, you can have as many SSL on one IP as you like.
When certbot is running correctly it will auto install a new cert every year.
The below sample will force all http traffic to https://anotherdomain1234.com/ and the subdomain (www) https://www.anotherdomain1234.com/ to https://anotherdomain1234.com/
you will want a cert for anotherdomain1234.com and www.anotherdomain1234.com this way the redirection does give a cert error to the user.
Sample Apache2 config before certbot:
<VirtualHost *:80>
ServerAdminThis email address is being protected from spambots. You need JavaScript enabled to view it.
ServerName anotherdomain1234.com
ServerAlias *.anotherdomain1234.com
DocumentRoot /var/www/anotherdomain1234.com/public_html
ErrorLog /var/www/anotherdomain1234.com/logs/error.log
CustomLog /var/www/anotherdomain1234.com/logs/access.log combined
RewriteEngine On
Redirect permanent / https://anotherdomain1234.com/
</VirtualHost>
<VirtualHost *:443>
ServerAdminThis email address is being protected from spambots. You need JavaScript enabled to view it.
ServerName anotherdomain1234.com
ServerAlias anotherdomain1234.com
DocumentRoot /var/www/anotherdomain1234.com/public_html
ErrorLog /var/www/anotherdomain1234.com/logs/error.log
CustomLog /var/www/anotherdomain1234.com/logs/access.log combined
</VirtualHost>
<VirtualHost *:443>
ServerAdminThis email address is being protected from spambots. You need JavaScript enabled to view it.
ServerName anotherdomain1234.com
ServerAlias www.anotherdomain1234.com
DocumentRoot /var/www/www.anotherdomain1234.com/public_html
ErrorLog /var/www/www.anotherdomain1234.com/logs/error.log
CustomLog /var/www/www.anotherdomain1234.com/logs/access.log combined
RewriteEngine On
Redirect permanent / https://anotherdomain1234.com/
</VirtualHost>
Ubuntu Dovecot and Postfix
- Details
Before You Begin
-
Ensure that the iptables firewall is not blocking any of the standard mail ports (
25,465,587,110,995,143, and993). If using a different form of firewall, confirm that it is not blocking any of the needed ports either.
Configure DNS
When ready to update the DNS and to start sending mail to the server, edit the domain’s MX record so that it points to the Linode’s domain or IP address, similar to the example below:
example.com A 10 12.34.56.78
example.com MX 10 example.com
mail.example.com MX 10 example.com
Ensure that the MX record is changed for all domains and subdomains that might receive email. If setting up a brand new domain, these steps can be performed prior to configuring the mail server. When using Linode’s DNS Manager, create an MX record that points to the desired domain or subdomain, and then create an A record for that domain or subdomain, which points to the correct IP address.
Installing an SSL Certificate
Dovecot offers a default self-signed certificate for free. This certificate encrypts the mail connections similar to a purchased certificate. However, the email users receive warnings about the certificate when they attempt to set up their email accounts. Optionally, you can purchase and configure a commercial SSL certificate to avoid the warnings. For information about SSL certificates, see Linode’s SSL Certificate guides.
NoteAs of version 2.2.13-7, Dovecot no longer provides a default SSL certificate. This affects Debian 8 users, and means that if you wish to use SSL encryption (recommended), you must generate your own self-signed certificate or use a trusted certificate from a Certificate Authority.
Many email service providers such as Gmail will only accept commercial SSL certificates for secure IMAP/POP3 connections. To communicate with these providers, follow our guide for obtaining a commercial SSL certificate.
Installing Packages
The next steps are to install the required packages on the Linode.
-
Log in as the root user via SSH. Replace
examplewith your domain name or IP address:ssh root@example -
Install the required packages:
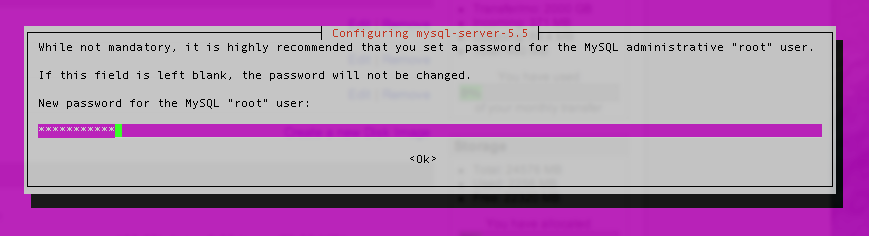
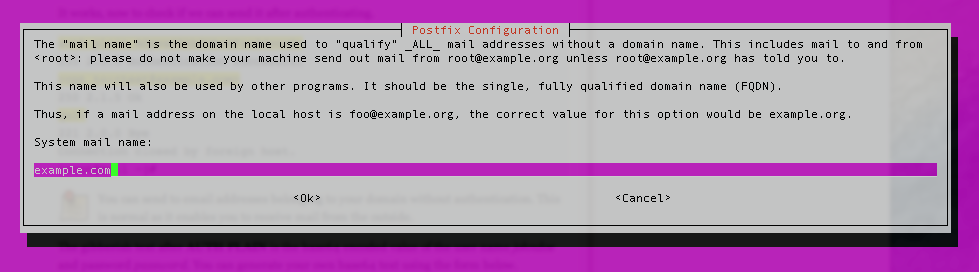
apt-get install postfix postfix-mysql dovecot-core dovecot-imapd dovecot-pop3d dovecot-lmtpd dovecot-mysql mysql-serverFollow the prompt to type in a secure MySQL password and to select the type of mail server you wish to configure. Select Internet Site. The System Mail Name should be the FQDN.

MySQL
-
Create a new database:
mysqladmin -p create mailserver -
Enter the MySQL root password.
-
Log in to MySQL:
mysql -p mailserver -
Create the MySQL user and grant the new user permissions over the database. Replace
mailuserpasswith a secure password:GRANT SELECT ON mailserver.* TO 'mailuser'@'127.0.0.1' IDENTIFIED BY 'mailuserpass'; -
Flush the MySQL privileges to apply the change:
FLUSH PRIVILEGES; -
Create a table for the domains that will receive mail on the Linode:
CREATE TABLE `virtual_domains` ( `id` int(11) NOT NULL auto_increment, `name` varchar(50) NOT NULL, PRIMARY KEY (`id`) ) ENGINE=InnoDB DEFAULT CHARSET=utf8; -
Create a table for all of the email addresses and passwords:
CREATE TABLE `virtual_users` ( `id` int(11) NOT NULL auto_increment, `domain_id` int(11) NOT NULL, `password` varchar(106) NOT NULL, `email` varchar(100) NOT NULL, PRIMARY KEY (`id`), UNIQUE KEY `email` (`email`), FOREIGN KEY (domain_id) REFERENCES virtual_domains(id) ON DELETE CASCADE ) ENGINE=InnoDB DEFAULT CHARSET=utf8; -
Create a table for the email aliases:
CREATE TABLE `virtual_aliases` (
  `id` int(11) NOT NULL auto_increment,
  `domain_id` int(11) NOT NULL,
  `source` varchar(100) NOT NULL,
  `destination` varchar(100) NOT NULL,
  PRIMARY KEY (`id`),
  FOREIGN KEY (domain_id) REFERENCES virtual_domains(id) ON DELETE CASCADE
) ENGINE=InnoDB DEFAULT CHARSET=utf8;
Adding Data
Now that the database and tables have been created, add some data to MySQL.
-
Add the domains to the
virtual_domainstable. Replace the values forexample.comandhostnamewith your own settings.INSERT INTO `mailserver`.`virtual_domains` (`id` ,`name`) VALUES ('1', 'example.com'), ('2', 'hostname.example.com'), ('3', 'hostname'), ('4', 'localhost.example.com');Note
Note whichidgoes with which domain, theidis necessary for the next two steps. -
Add email addresses to the
virtual_userstable. Replace the email address values with the addresses that you wish to configure on the mailserver. Replace thepasswordvalues with strong passwords.INSERT INTO `mailserver`.`virtual_users` (`id`, `domain_id`, `password` , `email`) VALUES ('1', '1', ENCRYPT('password', CONCAT('$6$', SUBSTRING(SHA(RAND()), -16))),This email address is being protected from spambots. You need JavaScript enabled to view it. '), ('2', '1', ENCRYPT('password', CONCAT('$6$', SUBSTRING(SHA(RAND()), -16))),This email address is being protected from spambots. You need JavaScript enabled to view it. '); -
To set up an email alias, add it to the
virtual_aliasestable.INSERT INTO `mailserver`.`virtual_aliases` (`id`, `domain_id`, `source`, `destination`) VALUES ('1', '1',This email address is being protected from spambots. You need JavaScript enabled to view it. ',This email address is being protected from spambots. You need JavaScript enabled to view it. ');
That’s it! Now you’re ready to verify that the data was successfully added to MySQL.
Testing
Since all of the information has been entered into MySQL, check that the data is there.
-
Check the contents of the
virtual_domainstable:SELECT * FROM mailserver.virtual_domains; -
Verify that you see the following output:
+----+-----------------------+ | id | name | +----+-----------------------+ | 1 | example.com | | 2 | hostname.example.com | | 3 | hostname | | 4 | localhost.example.com | +----+-----------------------+ 4 rows in set (0.00 sec) -
Check the
virtual_userstable:SELECT * FROM mailserver.virtual_users; -
Verify the following output, the hashed passwords are longer than they appear below:
+----+-----------+-------------------------------------+--------------------+ | id | domain_id | password | email | +----+-----------+-------------------------------------+--------------------+ | 1 | 1 | $6$574ef443973a5529c20616ab7c6828f7 |This email address is being protected from spambots. You need JavaScript enabled to view it. | | 2 | 1 | $6$030fa94bcfc6554023a9aad90a8c9ca1 |This email address is being protected from spambots. You need JavaScript enabled to view it. | +----+-----------+-------------------------------------+--------------------+ 2 rows in set (0.01 sec) -
Check the
virtual_aliasestable:SELECT * FROM mailserver.virtual_aliases; -
Verify the following output:
+----+-----------+-------------------+--------------------+ | id | domain_id | source | destination | +----+-----------+-------------------+--------------------+ | 1 | 1 |This email address is being protected from spambots. You need JavaScript enabled to view it. |This email address is being protected from spambots. You need JavaScript enabled to view it. | +----+-----------+-------------------+--------------------+ 1 row in set (0.00 sec) -
If everything outputs correctly, you’re done with MySQL! Exit MySQL:
exit
Postfix
Next, set up Postfix so the server can accept incoming messages for the domains.
-
Before making any changes, make a copy of the default Postfix configuration file in case you need to revert to the default configuration:
cp /etc/postfix/main.cf /etc/postfix/main.cf.orig -
Edit the
/etc/postfix/main.cffile to match the following. Ensure that occurrences ofexample.comare replaced with the domain name. Also, replacehostnamewith the system’s hostname on line 44.- /etc/postfix/main.cf
-
# See /usr/share/postfix/main.cf.dist for a commented, more complete version

# Debian specific:  Specifying a file name will cause the first
# line of that file to be used as the name.  The Debian default
# is /etc/mailname.
#myorigin = /etc/mailname

smtpd_banner = $myhostname ESMTP $mail_name (Ubuntu)
biff = no

# appending .domain is the MUA's job.
append_dot_mydomain = no

# Uncomment the next line to generate "delayed mail" warnings
#delay_warning_time = 4h

readme_directory = no

# TLS parameters
#smtpd_tls_cert_file=/etc/ssl/certs/ssl-cert-snakeoil.pem
#smtpd_tls_key_file=/etc/ssl/private/ssl-cert-snakeoil.key
#smtpd_use_tls=yes
#smtpd_tls_session_cache_database = btree:${data_directory}/smtpd_scache
#smtp_tls_session_cache_database = btree:${data_directory}/smtp_scache

smtpd_tls_cert_file=/etc/dovecot/dovecot.pem
smtpd_tls_key_file=/etc/dovecot/private/dovecot.pem
smtpd_use_tls=yes
smtpd_tls_auth_only = yes
smtp_tls_security_level = may
smtpd_tls_security_level = may

# Enabling SMTP for authenticated users, and handing off authentication to Dovecot
smtpd_sasl_type = dovecot
smtpd_sasl_path = private/auth
smtpd_sasl_auth_enable = yes

smtpd_recipient_restrictions =
        permit_sasl_authenticated,
        permit_mynetworks,
        reject_unauth_destination

# See /usr/share/doc/postfix/TLS_README.gz in the postfix-doc package for
# information on enabling SSL in the smtp client.

myhostname = hostname.example.com
alias_maps = hash:/etc/aliases
alias_database = hash:/etc/aliases
myorigin = /etc/mailname
#mydestination = example.com, hostname.example.com, localhost.example.com, localhost
mydestination = localhost
relayhost =
mynetworks = 127.0.0.0/8 [::ffff:127.0.0.0]/104 [::1]/128
mailbox_size_limit = 0
recipient_delimiter = +
inet_interfaces = all

# Handing off local delivery to Dovecot's LMTP, and telling it where to store mail
virtual_transport = lmtp:unix:private/dovecot-lmtp

# Virtual domains, users, and aliases
virtual_mailbox_domains = mysql:/etc/postfix/mysql-virtual-mailbox-domains.cf
virtual_mailbox_maps = mysql:/etc/postfix/mysql-virtual-mailbox-maps.cf
virtual_alias_maps = mysql:/etc/postfix/mysql-virtual-alias-maps.cf,
        mysql:/etc/postfix/mysql-virtual-email2email.cf
-
Create the file for virtual domains. Ensure that you change the password for the
mailuseraccount. If you used a different user, database name, or table name, change those settings as well.- /etc/postfix/mysql-virtual-mailbox-domains.cf
-
user = mailuser
password = mailuserpass
hosts = 127.0.0.1
dbname = mailserver
query = SELECT 1 FROM virtual_domains WHERE name='%s'
-
Create the
/etc/postfix/mysql-virtual-mailbox-maps.cffile, and enter the following values. Make sure you use themailuser’s password and make any other changes as needed.- /etc/postfix/mysql-virtual-mailbox-maps.cf
-
user = mailuser
password = mailuserpass
hosts = 127.0.0.1
dbname = mailserver
query = SELECT 1 FROM virtual_users WHERE email='%s'
-
Create the
/etc/postfix/mysql-virtual-alias-maps.cffile and enter the following values. Again, make sure you use the mailuser’s password, and make any other changes as necessary.- /etc/postfix/mysql-virtual-alias-maps.cf
-
user = mailuser
password = mailuserpass
hosts = 127.0.0.1
dbname = mailserver
query = SELECT destination FROM virtual_aliases WHERE source='%s'
-
Create the
/etc/postfix/mysql-virtual-email2email.cffile and enter the following values. Again, make sure you use the mailuser’s password, and make any other changes as necessary.- /etc/postfix/mysql-virtual-email2email.cf
-
user = mailuser
password = mailuserpass
hosts = 127.0.0.1
dbname = mailserver
query = SELECT email FROM virtual_users WHERE email='%s'
-
Save the changes you’ve made to the
/etc/postfix/mysql-virtual-email2email.cffile, and restart Postfix:sudo service postfix restart -
Enter the following command to ensure that Postfix can find the first domain. Be sure to replace
example.comwith the first virtual domain. The command should return1if it is successful.postmap -q example.com mysql:/etc/postfix/mysql-virtual-mailbox-domains.cf -
Test Postfix to verify that it can find the first email address in the MySQL table. Enter the following command, replacing
This email address is being protected from spambots. You need JavaScript enabled to view it. 1as the output:postmap -qThis email address is being protected from spambots. You need JavaScript enabled to view it. mysql:/etc/postfix/mysql-virtual-mailbox-maps.cf -
Test Postfix to verify that it can find the aliases by entering the following command. Be sure to replace
This email address is being protected from spambots. You need JavaScript enabled to view it. postmap -qThis email address is being protected from spambots. You need JavaScript enabled to view it. mysql:/etc/postfix/mysql-virtual-alias-maps.cfThis should return the email address to which the alias forwards, which is
This email address is being protected from spambots. You need JavaScript enabled to view it. -
Make a copy of the
/etc/postfix/master.cffile:cp /etc/postfix/master.cf /etc/postfix/master.cf.orig -
Open the configuration file for editing and uncomment the two lines starting with
submissionandsmtpsand the block of lines starting with-oafter each. The first section of the/etc/postfix/master.cffile should resemble the following:- /etc/postfix/master.cf
-
#
# Postfix master process configuration file.  For details on the format
# of the file, see the master(5) manual page (command: "man 5 master").
#
# Do not forget to execute "postfix reload" after editing this file.
#
# ==========================================================================
# service type  private unpriv  chroot  wakeup  maxproc command + args
#               (yes)   (yes)   (yes)   (never) (100)
# ==========================================================================
smtp      inet  n       -       -       -       -       smtpd
#smtp      inet  n       -       -       -       1       postscreen
#smtpd     pass  -       -       -       -       -       smtpd
#dnsblog   unix  -       -       -       -       0       dnsblog
#tlsproxy  unix  -       -       -       -       0       tlsproxy
submission inet n       -       -       -       -       smtpd
  -o syslog_name=postfix/submission
  -o smtpd_tls_security_level=encrypt
  -o smtpd_sasl_auth_enable=yes
  -o smtpd_client_restrictions=permit_sasl_authenticated,reject
  -o milter_macro_daemon_name=ORIGINATING
smtps     inet  n       -       -       -       -       smtpd
  -o syslog_name=postfix/smtps
  -o smtpd_tls_wrappermode=yes
  -o smtpd_sasl_auth_enable=yes
  -o smtpd_client_restrictions=permit_sasl_authenticated,reject
  -o milter_macro_daemon_name=ORIGINATING
-
Change the permissions on the
/etc/postfixdirectory to restrict permissions to allow only its owner and the corresponding group:chmod -R o-rwx /etc/postfix -
Restart Postfix:
service postfix restart
Congratulations! You have successfully configured Postfix.
Dovecot
Dovecot allows users to log in and check their email using POP3 and IMAP. In this section, configure Dovecot to force users to use SSL when they connect so that their passwords are never sent to the server in plain text.
-
Copy all of the configuration files so that you can easily revert back to them if needed:
cp /etc/dovecot/dovecot.conf /etc/dovecot/dovecot.conf.orig cp /etc/dovecot/conf.d/10-mail.conf /etc/dovecot/conf.d/10-mail.conf.orig cp /etc/dovecot/conf.d/10-auth.conf /etc/dovecot/conf.d/10-auth.conf.orig cp /etc/dovecot/dovecot-sql.conf.ext /etc/dovecot/dovecot-sql.conf.ext.orig cp /etc/dovecot/conf.d/10-master.conf /etc/dovecot/conf.d/10-master.conf.orig cp /etc/dovecot/conf.d/10-ssl.conf /etc/dovecot/conf.d/10-ssl.conf.orig -
Open the main configuration file and edit the contents to match the following. Specifically, add the line beginning with
protocolsunder the section beginning with “Enable installed protocols.”- /etc/dovecot/dovecot.conf
-
## Dovecot configuration file

# If you're in a hurry, see http://wiki2.dovecot.org/QuickConfiguration

# "doveconf -n" command gives a clean output of the changed settings. Use it
# instead of copy&pasting files when posting to the Dovecot mailing list.

# '#' character and everything after it is treated as comments. Extra spaces
# and tabs are ignored. If you want to use either of these explicitly, put the
# value inside quotes, eg.: key = "# char and trailing whitespace  "

# Default values are shown for each setting, it's not required to uncomment
# those. These are exceptions to this though: No sections (e.g. namespace {})
# or plugin settings are added by default, they're listed only as examples.
# Paths are also just examples with the real defaults being based on configure
# options. The paths listed here are for configure --prefix=/usr
# --sysconfdir=/etc --localstatedir=/var

# Enable installed protocols
!include_try /usr/share/dovecot/protocols.d/*.protocol
protocols = imap pop3 lmtp

# A comma separated list of IPs or hosts where to listen in for connections.
# "*" listens in all IPv4 interfaces, "::" listens in all IPv6 interfaces.
# If you want to specify non-default ports or anything more complex,
# edit conf.d/master.conf.
#listen = *, ::

# Base directory where to store runtime data.
#base_dir = /var/run/dovecot/

# Name of this instance. Used to prefix all Dovecot processes in ps output.
#instance_name = dovecot

# Greeting message for clients.
#login_greeting = Dovecot ready.

# Space separated list of trusted network ranges. Connections from these
# IPs are allowed to override their IP addresses and ports (for logging and
# for authentication checks). disable_plaintext_auth is also ignored for
# these networks. Typically you'd specify the IMAP proxy servers here.
#login_trusted_networks =

# Sepace separated list of login access check sockets (e.g. tcpwrap)
#login_access_sockets =

# Show more verbose process titles (in ps). Currently shows user name and
# IP address. Useful for seeing who are actually using the IMAP processes
# (eg. shared mailboxes or if same uid is used for multiple accounts).
#verbose_proctitle = no

# Should all processes be killed when Dovecot master process shuts down.
# Setting this to "no" means that Dovecot can be upgraded without
# forcing existing client connections to close (although that could also be
# a problem if the upgrade is e.g. because of a security fix).
#shutdown_clients = yes

# If non-zero, run mail commands via this many connections to doveadm server,
# instead of running them directly in the same process.
#doveadm_worker_count = 0
# UNIX socket or host:port used for connecting to doveadm server
#doveadm_socket_path = doveadm-server

# Space separated list of environment variables that are preserved on Dovecot
# startup and passed down to all of its child processes. You can also give
# key=value pairs to always set specific settings.
#import_environment = TZ

##
## Dictionary server settings
##

# Dictionary can be used to store key=value lists. This is used by several
# plugins. The dictionary can be accessed either directly or though a
# dictionary server. The following dict block maps dictionary names to URIs
# when the server is used. These can then be referenced using URIs in format
# "proxy::<name>".

dict {
  #quota = mysql:/etc/dovecot/dovecot-dict-sql.conf.ext
  #expire = sqlite:/etc/dovecot/dovecot-dict-sql.conf.ext
}

# Most of the actual configuration gets included below. The filenames are
# first sorted by their ASCII value and parsed in that order. The 00-prefixes
# in filenames are intended to make it easier to understand the ordering.
!include conf.d/*.conf

# A config file can also tried to be included without giving an error if
# it's not found:
!include_try local.conf
-
Save the changes to the
/etc/dovecot/dovecot.conffile. -
Open the
/etc/dovecot/conf.d/10-mail.conffile. This file controls how Dovecot interacts with the server’s file system to store and retrieve messages.Modify the following variables within the configuration file:
- /etc/dovecot/conf.d/10-mail.conf
-
mail_location = maildir:/var/mail/vhosts/%d/%n
...
mail_privileged_group = mail
Save your changes and exit.
-
Enter the following command to verify the permissions for
/var/mail:ls -ld /var/mail -
Verify that the permissions for
/var/mailare as follows. The date and time will likely be different in your output:drwxrwsr-x 2 root mail 4096 Mar 6 15:08 /var/mailIf your permissions do not match the above, go back and ensure you’ve completed the above steps correctly.
-
Create the
/var/mail/vhosts/directory and a subdirectory for your domain, replacingexample.com:mkdir -p /var/mail/vhosts/example.comThis directory will serve as storage for mail sent to your domain.
-
Create the
vmailuser with a user and group id of 5000 by entering the following commands, one by one. This user will be in charge of reading mail from the server.groupadd -g 5000 vmail useradd -g vmail -u 5000 vmail -d /var/mail -
Change the owner of the
/var/mail/folder and its contents to belong tovmail:chown -R vmail:vmail /var/mail -
Open the user authentication file, located in
/etc/dovecot/conf.d/10-auth.confand disable plain-text authentication by uncommenting this line:- /etc/dovecot/conf.d/10-auth.conf
-
disable_plaintext_auth = yes
Set the
auth_mechanismsby modifying the following line:- /etc/dovecot/conf.d/10-auth.conf
-
auth_mechanisms = plain login
Comment out the system user login line:
- /etc/dovecot/conf.d/10-auth.conf
-
#!include auth-system.conf.ext
Enable MySQL authentication by uncommenting the
auth-sql.conf.extline:- /etc/dovecot/conf.d/10-auth.conf
-
#!include auth-system.conf.ext
!include auth-sql.conf.ext
#!include auth-ldap.conf.ext
#!include auth-passwdfile.conf.ext
#!include auth-checkpassword.conf.ext
#!include auth-vpopmail.conf.ext
#!include auth-static.conf.ext
Save the changes to the
/etc/dovecot/conf.d/10-auth.conffile. -
Edit the
/etc/dovecot/conf.d/auth-sql.conf.extfile with the authentication information. Ensure your file contains the following lines and that they are uncommented:- /etc/dovecot/conf.d/auth-sql.conf.ext
-
passdb {
  driver = sql
  args = /etc/dovecot/dovecot-sql.conf.ext
}
userdb {
  driver = static
  args = uid=vmail gid=vmail home=/var/mail/vhosts/%d/%n
       }
Save the changes to the
/etc/dovecot/conf.d/auth-sql.conf.extfile. -
Update the
/etc/dovecot/dovecot-sql.conf.extfile with our custom MySQL connection information.Uncomment and set the
driverline as shown below:- /etc/dovecot/dovecot-sql.conf.ext
-
driver = mysql
Uncomment the
connectline and set the MySQL connection information. Use themailuser’s password and any other custom settings:- /etc/dovecot/dovecot-sql.conf.ext
-
connect = host=127.0.0.1 dbname=mailserver user=mailuser password=mailuserpass
Uncomment the
default_pass_schemeline and set it toSHA512-CRYPT:- /etc/dovecot/dovecot-sql.conf.ext
-
default_pass_scheme = SHA512-CRYPT
Uncomment the
password_queryline and set it to the following:- /etc/dovecot/dovecot-sql.conf.ext
-
password_query = SELECT email as user, password FROM virtual_users WHERE email='%u';
Note
This password query lets you use an email address listed in the
virtual_userstable as the username credential for an email account. If you want to be able to use the alias as the username instead (listed in thevirtual_aliasestable), first add every primary email address to thevirtual_aliasestable (directing to themselves) and then use the following line in/etc/dovecot/dovecot-sql.conf.extinstead:password_query = SELECT email as user, password FROM virtual_users WHERE email=(SELECT destination FROM virtual_aliases WHERE source = ‘%u’);
Save the changes to the
/etc/dovecot/dovecot-sql.conf.extfile. -
Change the owner and group of the
/etc/dovecot/directory tovmailanddovecot:chown -R vmail:dovecot /etc/dovecot -
Change the permissions on the
/etc/dovecot/directory:chmod -R o-rwx /etc/dovecot -
Open the sockets configuration file, located at
/etc/dovecot/conf.d/10-master.confNote
There are many nested blocks of code in this file, so please pay close attention to the brackets. It’s probably better if you edit line by line, rather than copying large chunks of code. If there’s a syntax error, Dovecot will crash silently, but you can check/var/log/upstart/dovecot.logto help you find the error. -
Disable unencrypted IMAP and POP3 by setting the protocols’ ports to 0, as shown below. Ensure that the entries for port and ssl below the IMAPS and pop3s entries are uncommented:
- /etc/dovecot/conf.d/10-master.conf
-
service imap-login {
  inet_listener imap {
    port = 0
  }
inet_listener imaps {
  port = 993
  ssl = yes
  }
        ...
          service pop3-login {
inet_listener pop3 {
  port = 0
}
  inet_listener pop3s {
    port = 995
    ssl = yes
  }
          ...
          }
Note
Leave the secure versions unedited, specifically theimapsandpop3s, so that their ports still work. The default settings forimapsandpop3sare fine. Optionally, leave theportlines commented out, as the default ports are the standard 993 and 995.Find the
service lmtpsection and use the configuration shown below:- /etc/dovecot/conf.d/10-master.conf
-
service lmtp {
    unix_listener /var/spool/postfix/private/dovecot-lmtp {
      mode = 0600
      user = postfix
      group = postfix
    }
# Create inet listener only if you can't use the above UNIX socket
#inet_listener lmtp {
  # Avoid making LMTP visible for the entire internet
  #address =
  #port =
#}
          }
Locate the
service authsection and configure it as shown below:- /etc/dovecot/conf.d/10-master.conf
-
service auth {
  # auth_socket_path points to this userdb socket by default. It's typically
  # used by dovecot-lda, doveadm, possibly imap process, etc. Its default
  # permissions make it readable only by root, but you may need to relax these
  # permissions. Users that have access to this socket are able to get a list
  # of all usernames and get results of everyone's userdb lookups.
  unix_listener /var/spool/postfix/private/auth {
    mode = 0666
    user = postfix
    group = postfix
  }

  unix_listener auth-userdb {
    mode = 0600
    user = vmail
    #group =
  }

  # Postfix smtp-auth
  #unix_listener /var/spool/postfix/private/auth {
  #  mode = 0666
  #}

  # Auth process is run as this user.
  user = dovecot
}
In the
service auth-workersection, uncomment theuserline and set it tovmailas shown below:- /etc/dovecot/conf.d/10-master.conf
-
service auth-worker {
  # Auth worker process is run as root by default, so that it can access
  # /etc/shadow. If this isn't necessary, the user should be changed to
  # $default_internal_user.
  user = vmail
}
Save the changes to the
/etc/dovecot/conf.d/10-master.conffile. -
Verify that the default Dovecot SSL certificate and key exist:
ls /etc/dovecot/dovecot.pem
ls /etc/dovecot/private/dovecot.pem
Note
If can't ls files because they don't exist
run this:openssl req -new -x509 -days 1000 -nodes -out "/etc/dovecot/dovecot.pem" -keyout "/etc/dovecot/private/dovecot.pem"
-
Open
/etc/dovecot/conf.d/10-ssl.conf. -
Verify that the
ssl_certsetting has the correct path to the certificate, and that thessl_keysetting has the correct path to the key. The default setting displayed uses Dovecot’s built-in certificate, so you can leave this as-is if using the Dovecot certificate. Update the paths accordingly if you are using a different certificate and key.- /etc/dovecot/conf.d/10-ssl.conf
-
ssl_cert = </etc/dovecot/dovecot.pem
ssl_key = </etc/dovecot/private/dovecot.pem
Force the clients to use SSL encryption by uncommenting the
sslline and setting it torequired:- /etc/dovecot/conf.d/10-ssl.conf
-
ssl = required
Save the changes to the
/etc/dovecot/conf.d/10-ssl.conffile. -
Finally, restart Dovecot:
service dovecot restart
Test Email
-
Set up a test account in an email client to ensure that everything is working. Many clients detect server settings automatically. However, manual configuration requires the following parameters:
- the full email address, including the
@example.compart, is the username. - the password should be the one you added to the MySQL table for this email address.
- The incoming and outgoing server names must be a domain that resolves to the Linode.
- Both the incoming and outgoing servers require authentication and SSL encryption.
- You should use Port 993 for secure IMAP, Port 995 for secure POP3, and Port 587 with SSL for SMTP.
- the full email address, including the
-
Try sending an email to this account from an outside email account and then reply to it. Check the mail log file in /var/log/mail.log for the following output (the first block is for an incoming message, and the second block for an outgoing message):
- You now have a functioning mail server that can securely send and receive email. If things are not working smoothly, try consulting the Troubleshooting Problems with Postfix, Dovecot, and MySQLguide. At this point, consider adding spam and virus filtering and a webmail client. If DNS records have not been created for the mail server yet, do so now. Once the DNS records have propagated, email will be delivered via the new mail server.
NoteIf errors are encountered in the /var/log/syslog stating “Invalid settings: postmaster_address setting not given”, you may need to append the following line to the /etc/dovecot/dovecot.conf file, replacing domain with the domain name.
postmaster_address=postmaster at DOMAIN
Adding New Domains, Email Addresses, and Aliases
Although the mail server is up and running, eventually you’ll probably need to add new domains, email addresses, and aliases for the users. To do this, simply add a new line to the appropriate MySQL table. These instructions are for command-line MySQL, but you can also use phpMyAdmin to add new entries to the tables.
Domains
-
To add a new domain, open a terminal window and log in to the Linode via SSH.
-
Log in to the MySQL server with an appropriately privileged user. For this example, use the
rootuser:mysql -u root -p mailserver -
Enter the root MySQL password when prompted.
-
Always view the contents of the table before adding new entries. Enter the following command to view the current contents of any table, replacing
virtual_domainswith the table:SELECT * FROM mailserver.virtual_domains; -
The output should resemble the following:
+----+-----------------------+ | id | name | +----+-----------------------+ | 1 | example.com | | 2 | hostname.example.com | | 3 | hostname | | 4 | localhost.example.com | +----+-----------------------+ -
To add another domain, enter the following command, replacing
newdomain.comwith the domain name:INSERT INTO `mailserver`.`virtual_domains` (`name`) VALUES ('newdomain.com'); -
Verify that the new domain has been added. The output should display the new domain name.
SELECT * FROM mailserver.virtual_domains; -
Exit MySQL:
quit
You have successfully added the new domain to the Postfix and Dovecot setup.
Email Addresses
-
To add a new email address, enter the following command in MySQL, replacing
newpasswordwith the user’s password, andThis email address is being protected from spambots. You need JavaScript enabled to view it. INSERT INTO `mailserver`.`virtual_users` (`domain_id`, `password` , `email`) VALUES ('5', ENCRYPT('newpassword', CONCAT('$6$', SUBSTRING(SHA(RAND()), -16))) ,This email address is being protected from spambots. You need JavaScript enabled to view it. ');Note
Be sure to use the correct number for thedomain_id. In this case, we are using5, because we want to make an email address fornewdomain.com, andnewdomain.comhas anidof5in thevirtual_domainstable. -
Verify that the new email address has been added. The new email address should be displayed in the output.
SELECT * FROM mailserver.virtual_users; -
Exit MySQL:
quit
You have successfully added the new email address to the Postfix and Dovecot setup.
Aliases
-
To add a new alias, enter the following command in MySQL, replacing
This email address is being protected from spambots. You need JavaScript enabled to view it. This email address is being protected from spambots. You need JavaScript enabled to view it. This email address is being protected from spambots. You need JavaScript enabled to view it. INSERT INTO `mailserver`.`virtual_aliases` (`domain_id`, `source`, `destination`) VALUES ('5',This email address is being protected from spambots. You need JavaScript enabled to view it. ',This email address is being protected from spambots. You need JavaScript enabled to view it. ');Note
Ensure that the correct number is entered for thedomain_idvalue. Use theidof the domain for this email address. For an explanation ofidus, see the email users section above.You can also add a “catch-all” alias which will forward all emails sent to a domain which do not have matching aliases or users by specifying
@newdomain.comas the source of the alias.INSERT INTO `mailserver`.`virtual_aliases` (`domain_id`, `source`, `destination`) VALUES ('5',This email address is being protected from spambots. You need JavaScript enabled to view it. ',This email address is being protected from spambots. You need JavaScript enabled to view it. '); -
Verify that the new alias has been added. The new alias will be displayed in the output.
SELECT * FROM mailserver.virtual_aliases; -
Exit MySQL:
quit
You have now successfully added the new alias to the Postfix and Dovecot setup.
My Acurite new hub issues
- Details
If you had the older hub that reported your sensor(s) data they are requiring you to get a new hub (at a discount) to support new technology. They say they have out grown their infrastructure ability to handle the all the hubs plus the new hub will offer better services. Maybe the new hub will handle devices better in the future and will be a good thing but forcing customer to pay for a new hub because you don't want to support the hundreds of thousands of hubs you have sold is pretty crappy. I am software engineer and system architect and have have been working in the field 30+ years. I call BS and this is just a money grab to make up for short falls on lack of their planning.
I decided to play along. I have 6 sensors around the house and a 5-1 weather station and just got this fancy new hub that looks like Google Home speaker. Now I plugged in the new hub and all my device show...
as.... Temp & Humidity Sensor-6
Temp & Humidity Sensor-5
Temp & Humidity Sensor-4
Temp & Humidity Sensor-3
Temp & Humidity Sensor-2
Temp & Humidity Sensor-1
WTH....
You guys didn't think to make it so when a new hub is added to see if you wanted to add the old sensors name to it.
Any upgrade option in the portal you could run would be a good idea. You can even have the web interface see if any sensor has the same sensor id. Would have took any good programmer maybe 1 day to write.
Here is something they code do: Put the sensor Identifier on the damn sensor.. If you go on your network and get the IP address of you new or old hub you can browse to it. you will see a nice list of sensors. it looks like this:
| # | Type | Id | Last Time (UTC) | Signal | Battery |
| 0 | tower | 00011180 | 2018-02-28T22:50:39 | 4 | Normal |
| 1 | tower | 00014066 | 2018-02-28T22:50:35 | 4 | Normal |
| 2 | 5N1 | 00002048 | 2018-02-28T22:50:29 | 4 | Normal |
| 3 | tower | 00008041 | 2018-02-28T22:50:24 | 4 | Normal |
| 4 | tower | 00010030 | 2018-02-28T22:50:30 | 4 | Normal |
| 6 | tower | 00010601 | 2018-02-28T22:50:36 | 4 | Normal |
If they showed the sensor ID on myacurite.com I could mach them and not have to play the which sensor is which game. When I first got all my sensors I turned one on at a time and labeled them with the ID using a sharpie as they registered on the hub..
Sample config for ejabberd process-one.net Ldap login Ldap vcards
- Details
### ###' ejabberd configuration file ### ### ### The parameters used in this configuration file are explained in more detail ### in the ejabberd Installation and Operation Guide. ### Please consult the Guide in case of doubts, it is included with ### your copy of ejabberd, and is also available online at ### http://www.process-one.net/en/ejabberd/docs/ ### The configuration file is written in YAML. ### Refer to http://en.wikipedia.org/wiki/YAML for the brief description. ### However, ejabberd treats different literals as different types: ### ### - unquoted or single-quoted strings. They are called "atoms". ### Example: dog, 'Jupiter', '3.14159', YELLOW ### ### - numeric literals. Example: 3, -45.0, .0 ### ### - quoted or folded strings. ### Examples of quoted string: "Lizzard", "orange". ### Example of folded string: ### > Art thou not Romeo, ### and a Montague? ###. ======= ###' LOGGING ## ## loglevel: Verbosity of log files generated by ejabberd. ## 0: No ejabberd log at all (not recommended) ## 1: Critical ## 2: Error ## 3: Warning ## 4: Info ## 5: Debug ## loglevel: 4 ## ## rotation: Disable ejabberd's internal log rotation, as the Debian package ## uses logrotate(8). log_rotate_size: 0 log_rotate_date: "" ## ## overload protection: If you want to limit the number of messages per second ## allowed from error_logger, which is a good idea if you want to avoid a flood ## of messages when system is overloaded, you can set a limit. ## 100 is ejabberd's default. log_rate_limit: 100 ## ## watchdog_admins: Only useful for developers: if an ejabberd process ## consumes a lot of memory, send live notifications to these XMPP ## accounts. ## ## watchdog_admins: ## - "REF: https://www.process-one.net/en/ejabberd/#getejabberdThis email address is being protected from spambots. You need JavaScript enabled to view it. " ###. =============== ###' NODE PARAMETERS ## ## net_ticktime: Specifies net_kernel tick time in seconds. This options must have ## identical value on all nodes, and in most cases shouldn't be changed at all from ## default value. ## ## net_ticktime: 60 ###. ================ ###' SERVED HOSTNAMES ## ## hosts: Domains served by ejabberd. ## You can define one or several, for example: ## hosts: ## - "example.net" ## - "example.com" ## - "example.org" ## hosts: - "localhost" - "chat" ## ## route_subdomains: Delegate subdomains to other XMPP servers. ## For example, if this ejabberd serves example.org and you want ## to allow communication with an XMPP server called im.example.org. ## ## route_subdomains: s2s ###. =============== ###' LISTENING PORTS ## ## listen: The ports ejabberd will listen on, which service each is handled ## by and what options to start it with. ## listen: - port: 5222 ip: "::" module: ejabberd_c2s ## ## If TLS is compiled in and you installed a SSL ## certificate, specify the full path to the ## file and uncomment these lines: ## certfile: "/etc/ejabberd/ejabberd.pem" starttls: true ## ## To enforce TLS encryption for client connections, ## use this instead of the "starttls" option: ## ## starttls_required: true ## ## Custom OpenSSL options ## protocol_options: - "no_sslv3" ## - "no_tlsv1" max_stanza_size: 65536 shaper: c2s_shaper access: c2s zlib: true resend_on_timeout: if_offline - port: 5269 ip: "::" module: ejabberd_s2s_in ## ## ejabberd_service: Interact with external components (transports, ...) ## ## - ## port: 8888 ## module: ejabberd_service ## access: all ## shaper_rule: fast ## ip: "127.0.0.1" ## hosts: ## "icq.example.org": ## password: "secret" ## "sms.example.org": ## password: "secret" ## ## ejabberd_stun: Handles STUN Binding requests ## ## - ## port: 3478 ## transport: udp ## module: ejabberd_stun ## ## To handle XML-RPC requests that provide admin credentials: ## ## - ## port: 4560 ## module: ejabberd_xmlrpc ## access_commands: {} - port: 5280 ip: "::" module: ejabberd_http request_handlers: "/websocket": ejabberd_http_ws ## "/pub/archive": mod_http_fileserver web_admin: true http_bind: true ## register: true mydomaintcha: true tls: false certfile: "/etc/ejabberd/ejabberd.pem" ## Disabling digest-md5 SASL authentication. digest-md5 requires plain-text ## password storage (see auth_password_format option). disable_sasl_mechanisms: "digest-md5" ###. ================== ###' S2S GLOBAL OPTIONS ## ## s2s_use_starttls: Enable STARTTLS + Dialback for S2S connections. ## Allowed values are: false optional required required_trusted ## You must specify a certificate file. ## s2s_use_starttls: optional ## ## s2s_certfile: Specify a certificate file. ## s2s_certfile: "/etc/ejabberd/ejabberd.pem" ## Custom OpenSSL options ## s2s_protocol_options: - "no_sslv3" ## - "no_tlsv1" ## ## domain_certfile: Specify a different certificate for each served hostname. ## ## host_config: ## "example.org": ## domain_certfile: "/path/to/example_org.pem" ## "example.com": ## domain_certfile: "/path/to/example_com.pem" ## ## S2S whitelist or blacklist ## ## Default s2s policy for undefined hosts. ## ## s2s_access: s2s ## ## Outgoing S2S options ## ## Preferred address families (which to try first) and connect timeout ## in milliseconds. ## ## outgoing_s2s_families: ## - ipv4 ## - ipv6 ## outgoing_s2s_timeout: 10000 ###. ============== ###' AUTHENTICATION ## ## auth_method: Method used to authenticate the users. ## The default method is the internal. ## If you want to use a different method, ## comment this line and enable the correct ones. ## ##auth_method: internal ## ## Store the plain passwords or hashed for SCRAM: ## auth_password_format: plain ##auth_password_format: scram ## ## Define the FQDN if ejabberd doesn't detect it: ## fqdn: "server3.example.com" ## ## Authentication using external script ## Make sure the script is executable by ejabberd. ## ## auth_method: external ## extauth_program: "/path/to/authentication/script" ## ## Authentication using ODBC ## Remember to setup a database in the next section. ## ## auth_method: odbc ## ## Authentication using PAM ## ## auth_method: pam ## pam_service: "pamservicename" ## ## Authentication using LDAP ## ##auth_method: ldap ## ## List of LDAP servers: ##ldap_servers: ## - "192.168.5.55" ## - "192.168.5.56" ## ## Encryption of connection to LDAP servers: ##ldap_encrypt: none ##ldap_encrypt: tls ## ## Port to connect to on LDAP servers: ##ldap_port: 389 ##ldap_port: 636 ## ## LDAP manager: ##ldap_rootdn: "CN=LDAP Service,OU=mydomain Users,DC=mydomain,DC=local" ##ldap_rootdn: "CN=LDAP Service" ## ## Password of LDAP manager: ##ldap_password: "M@na93d4DAcc0unt" ## ## Search base of LDAP directory: ## ldap_base: "OU=mydomain Users" ## ## LDAP attribute that holds user ID: ##ldap_uids: ## - "sAMAccountName": "%u" ## ## LDAP filter: ##ldap_filter: "(memberOf=*)" auth_method: [ldap] ldap_servers: - "192.168.1.2" - "192.168.1.3" ldap_base: "OU=mydomain Users,DC=mydomain,DC=local" ldap_rootdn: "CN=LDAP Service,OU=mydomain Users,DC=mydomain,DC=local" ldap_password: "AcPassw0rd!" ldap_uids: ["sAMAccountName"] ldap_filter: "(memberOf=*)" ## ## Anonymous login support: ## auth_method: anonymous ## anonymous_protocol: sasl_anon | login_anon | both ## allow_multiple_connections: true | false ## ## host_config: ## "public.example.org": ## auth_method: anonymous ## allow_multiple_connections: false ## anonymous_protocol: sasl_anon ## ## To use both anonymous and internal authentication: ## ## host_config: ## "public.example.org": ## auth_method: ## - internal ## - anonymous ###. ============== ###' DATABASE SETUP ## ejabberd by default uses the internal Mnesia database, ## so you do not necessarily need this section. ## This section provides configuration examples in case ## you want to use other database backends. ## Please consult the ejabberd Guide for details on database creation. ## ## MySQL server: ## ## odbc_type: mysql ## odbc_server: "server" ## odbc_database: "database" ## odbc_username: "username" ## odbc_password: "password" ## ## If you want to specify the port: ## odbc_port: 1234 ## ## PostgreSQL server: ## ## odbc_type: pgsql ## odbc_server: "server" ## odbc_database: "database" ## odbc_username: "username" ## odbc_password: "password" ## ## If you want to specify the port: ## odbc_port: 1234 ## ## If you use PostgreSQL, have a large database, and need a ## faster but inexact replacement for "select count(*) from users" ## ## pgsql_users_number_estimate: true ## ## SQLite: ## ## odbc_type: sqlite ## odbc_database: "/path/to/database.db" ## ## ODBC compatible or MSSQL server: ## ## odbc_type: odbc ## odbc_server: "DSN=ejabberd;UID=ejabberd;PWD=ejabberd" ## ## Number of connections to open to the database for each virtual host ## ## odbc_pool_size: 10 ## ## Interval to make a dummy SQL request to keep the connections to the ## database alive. Specify in seconds: for example 28800 means 8 hours ## ## odbc_keepalive_interval: undefined ###. =============== ###' TRAFFIC SHAPERS shaper: ## ## The "normal" shaper limits traffic speed to 1000 B/s ## normal: 1000 ## ## The "fast" shaper limits traffic speed to 50000 B/s ## fast: 50000 ## ## This option specifies the maximum number of elements in the queue ## of the FSM. Refer to the documentation for details. ## max_fsm_queue: 1000 ###. ==================== ###' ACCESS CONTROL LISTS acl: ## ## The 'admin' ACL grants administrative privileges to XMPP accounts. ## You can put here as many accounts as you want. ## admin: user: - "": "localhost" user: - "mell": "chat" user: - "admin": "chat" ## ## Blocked users ## ## blocked: ## user: ## - "baduser": "example.org" ## - "test" ## Local users: don't modify this. ## local: user_regexp: "" ## ## More examples of ACLs ## ## jabberorg: ## server: ## - "jabber.org" ## aleksey: ## user: ## - "aleksey": "jabber.ru" ## test: ## user_regexp: "^test" ## user_glob: "test*" ## ## Loopback network ## loopback: ip: - "127.0.0.0/8" ## ## Bad XMPP servers ## ## bad_servers: ## server: ## - "xmpp.zombie.org" ## - "xmpp.spam.com" ## ## Define specific ACLs in a virtual host. ## ## host_config: ## "localhost": ## acl: ## admin: ## user: ## - "bob-local": "localhost" ###. ============ ###' ACCESS RULES access: ## Maximum number of simultaneous sessions allowed for a single user: max_user_sessions: all: 10 ## Maximum number of offline messages that users can have: max_user_offline_messages: admin: 5000 all: 100 ## This rule allows access only for local users: local: local: allow ## Only non-blocked users can use c2s connections: c2s: blocked: deny all: allow ## For C2S connections, all users except admins use the "normal" shaper c2s_shaper: admin: none all: normal ## All S2S connections use the "fast" shaper s2s_shaper: all: fast ## Only admins can send announcement messages: announce: admin: allow ## Only admins can use the configuration interface: configure: admin: allow ## Admins of this server are also admins of the MUC service: muc_admin: admin: allow ## Only accounts of the local ejabberd server can create rooms: muc_create: local: allow ## All users are allowed to use the MUC service: muc: all: allow ## Only accounts on the local ejabberd server can create Pubsub nodes: pubsub_createnode: local: allow ## In-band registration allows registration of any possible username. ## To disable in-band registration, replace 'allow' with 'deny'. register: all: allow ## Only allow to register from localhost trusted_network: loopback: allow ## Do not establish S2S connections with bad servers ## s2s: ## bad_servers: deny ## all: allow ## By default the frequency of account registrations from the same IP ## is limited to 1 account every 10 minutes. To disable, specify: infinity ## registration_timeout: 600 ## ## Define specific Access Rules in a virtual host. ## ## host_config: ## "localhost": ## access: ## c2s: ## admin: allow ## all: deny ## register: ## all: deny ###. ================ ###' DEFAULT LANGUAGE ## ## language: Default language used for server messages. ## language: "en" ## ## Set a different default language in a virtual host. ## ## host_config: ## "localhost": ## language: "ru" ###. ======= ###' mydomainTCHA ## ## Full path to a script that generates the image. ## ## mydomaintcha_cmd: "/usr/share/ejabberd/mydomaintcha.sh" ## ## Host for the URL and port where ejabberd listens for mydomainTCHA requests. ## ## mydomaintcha_host: "example.org:5280" ## ## Limit mydomainTCHA calls per minute for JID/IP to avoid DoS. ## ## mydomaintcha_limit: 5 ###. ======= ###' MODULES ## ## Modules enabled in all ejabberd virtual hosts. ## modules: mod_adhoc: {} mod_admin_extra: {} mod_announce: # recommends mod_adhoc access: announce mod_blocking: {} # requires mod_privacy mod_mydomains: {} mod_carboncopy: {} mod_client_state: {} mod_configure: {} # requires mod_adhoc mod_disco: {} mod_echo: {} mod_irc: {} mod_http_bind: {} ## mod_http_fileserver: ## docroot: "/var/www" ## accesslog: "/var/log/ejabberd/access.log" mod_last: {} mod_muc: ## host: "conference.@HOST@" access: muc access_create: muc_create access_persistent: muc_create access_admin: muc_admin ## mod_muc_log: {} mod_muc_admin: {} ## mod_multicast: {} mod_offline: access_max_user_messages: max_user_offline_messages mod_ping: {} ## mod_pres_counter: ## count: 5 ## interval: 60 mod_privacy: {} mod_private: {} ## mod_proxy65: {} mod_pubsub: access_createnode: pubsub_createnode ## reduces resource comsumption, but XEP incompliant ignore_pep_from_offline: true ## XEP compliant, but increases resource comsumption ## ignore_pep_from_offline: false last_item_cache: false plugins: - "flat" - "hometree" - "pep" # pep requires mod_mydomains mod_register: ## ## Protect In-Band account registrations with mydomainTCHA. ## ## mydomaintcha_protected: true ## ## Set the minimum informational entropy for passwords. ## ## password_strength: 32 ## ## After successful registration, the user receives ## a message with this subject and body. ## welcome_message: subject: "Welcome!" body: |- Hi. Welcome to this XMPP server. ## ## When a user registers, send a notification to ## these XMPP accounts. ## ## registration_watchers: ## - "This email address is being protected from spambots. You need JavaScript enabled to view it. " ## ## Only clients in the server machine can register accounts ## ip_access: trusted_network ## ## Local c2s or remote s2s users cannot register accounts ## ## access_from: deny access: register mod_roster: {} mod_shared_roster: {} mod_stats: {} mod_time: {} mod_vcard: search: false mod_vcard_ldap: ldap_rootdn: "CN=LDAP Service,OU=mydomain Users,DC=mydomain,DC=local" ldap_password: "AcPassw0rd!" ldap_base: "OU=mydomain Users,DC=mydomain,DC=local" ldap_uids: "userPrincipalName": "%This email address is being protected from spambots. You need JavaScript enabled to view it. " ldap_vcard_map: "FN": {"%s": ["displayName"]} "EMAIL": {"%This email address is being protected from spambots. You need JavaScript enabled to view it. ": ["sAMAccountName"]} "TITLE": {"%s": ["title"]} "DESC": {"%s": ["description"]} "TEL": {"%s": ["telephoneNumber"]} "PHOTO": {"%s": ["jpegPhoto"]} ldap_search_fields: "User": "%u" "Name": "givenName" "Family Name": "sn" "Email": "mail" ldap_search_reported: "Full Name": "FN" "Email": "EMAIL" ## ## Enable modules with custom options in a specific virtual host ## ## host_config: ## "localhost": ## modules: ## mod_echo: ## host: "mirror.localhost" ## ## Enable modules management via ejabberdctl for installation and ## uninstallation of public/private contributed modules ## (enabled by default) ## allow_contrib_modules: true ###. ###' ### Local Variables: ### mode: yaml ### End: ### vim: set filetype=yaml tabstop=8 foldmarker=###',###. foldmethod=marker:
Page 2 of 40